Categories
Life recipe

Peanut Butter Cookies

A mother’s food memory of baking and having fun in the kitchen.

Before I became a mother, I had many thoughts and ideas about the kind of parent I’d be to my kid(s). Like most, these ideals stemmed from my own childhood. Food is a big deal in our family; Dad had always been a terrific cook and my earliest food memory is of the ubiquitous belachan (fermented shrimp paste) aroma that permeated our kitchen (and our whole apartment) whenever he made my favourite sambal belachan. I used to compete with my siblings to see who could tahan (Malay for tolerate) the most amount of said sambal. Oh the beads of sweat that would trickle down my temple as I shoveled down that tangy, briny and very shrimpy chili staple with copious amounts of rice and whatever was on our dinner table.

Though not much of a baker, Dad would whip up some gloriously light and fragrant orange pound cake whenever my school had a fund-raising carnival (fellow Convent girls will know what I’m talking about). You see, we each had to contribute to our class ‘stall’ and my dad’s slices of pound cake would always sell out by mid-day. At $0.10 a slice, it was quite a steal.

To this day, any mention of pound cake and I think of that citrusy rendition that I associate pound cake with. With my eyes closed, I catch an imaginary whiff of that orange scent, from all the freshly grated rind.

That cake memory may very well be the genesis of a certain fantasy I began to paint in my mind – I would own a large kitchen where I baked/cooked everything my heart desired and where I would eventually relegate my kid(s) to, training them up to be my adorable little Oompa Loompas. Isn’t it every parent’s dream for their kids to bring them breakfast in bed during the weekends?

Thus began my personal journey as an amateur baker and cook (I can’t teach my kid(s) unless I pick up some skills eh?). In 2005, I started a little blog to document my kitchen experiments, both good and not so good ones. It was an era before Facebook, Instagram and Whatsapp mind you. Blogger (and later on WordPress) was the hottest platform to be on. I made so many wonderful friends (far and wide) via my blog. I used to participate in what was called “Blogging by Mail“. I’ve had hardtack candies sent to me from Tennessee, USA, and I once mailed Milo and my signature chocolate chunk cookies to Iowa. I moved my blog to a .net domain in 2009 but due to some technical roadblocks I lost my site (along with my posts) and relied mostly on Instagram to churn out more foodporn and what I’ve since been baking for my own family and kids.

Having been more nostalgic, and contemplative (no thanks to the pandemic), I re-read some of my old posts and realised that I really miss long-form writing. Instant posts on the ‘Gram or FB just didn’t cut it. There was an itch to scratch. With more time on my hands, I sunk my teeth into WordPress once more. There’s no time better than the present for me to document this chapter of my life as a mother and wife. It would be really nice for my sons to have a record of our kitchen (and other) adventures.

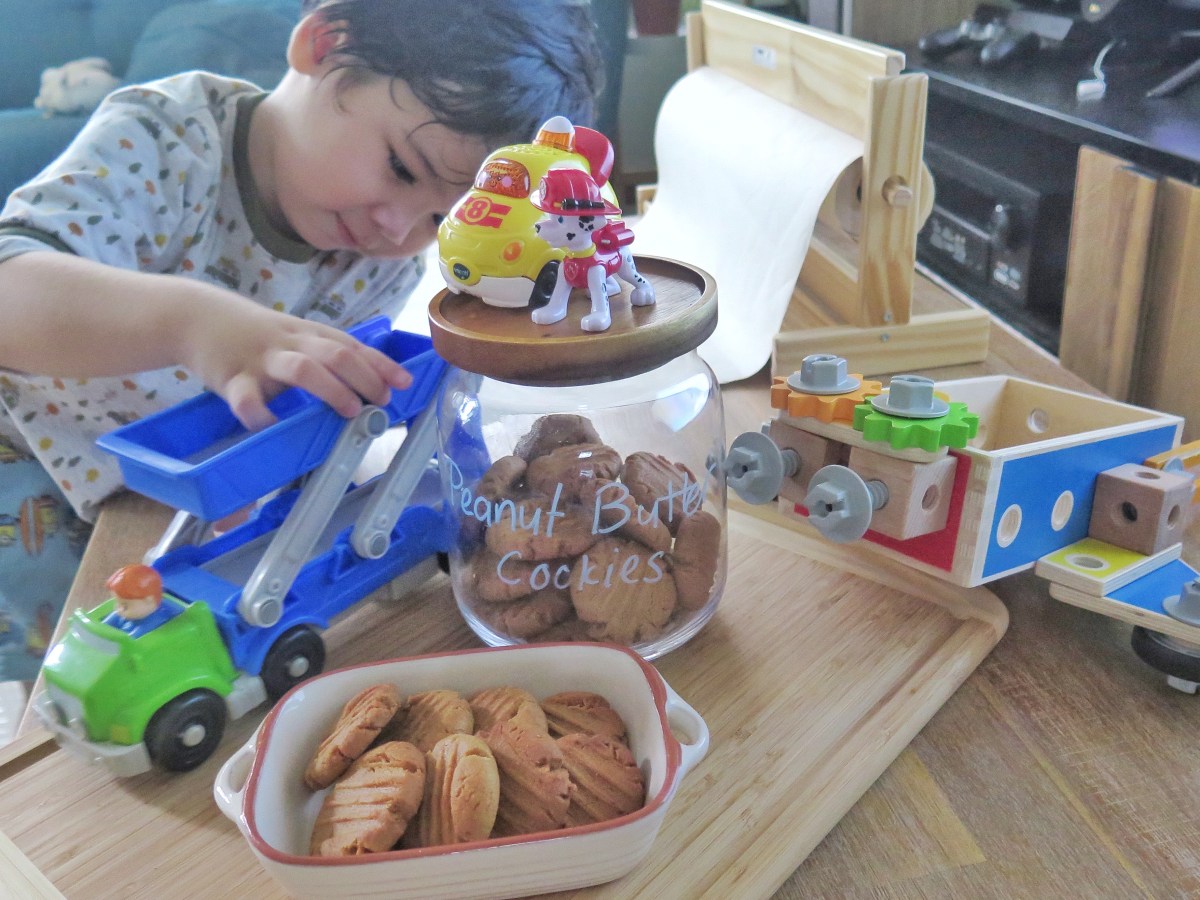
Yesterday, my son Ciaran walked into the kitchen and asked me “where cookies?”. Last weekend’s batch of homemade oatmeal cookies had been depleted (we are a very hungry family) and he wanted more. I asked what type of cookies he wanted me to make – “Peanut butter!” he shouted with enthusiasm. Our family goes through peanut butter faster thank you can say “peanut butter jelly time”. Our preferred brand of choice is most definitely Pic’s peanut butter. They use hi-oleic peanuts and they’ve got a salt-free option that we love.

Peanut butter – a staple we always have in our pantry.

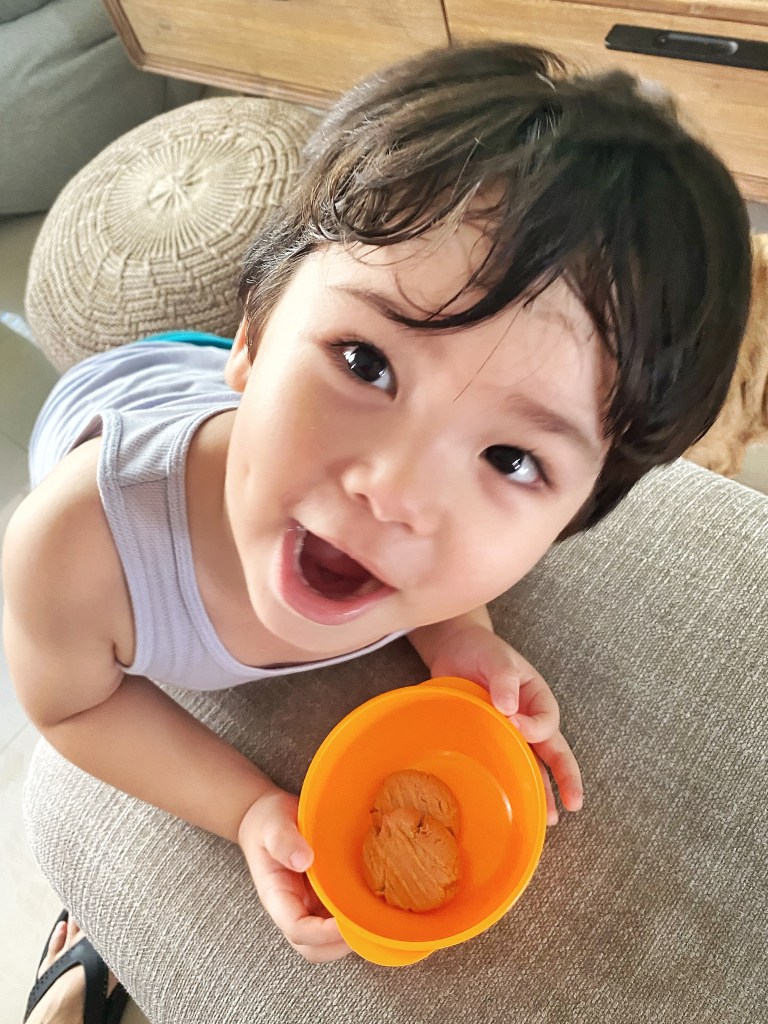
With my jar of peanut butter at the ready, I started to prep and weigh out the ingredients. Just as I was about to combine everything, in came Ciaran with his wide smile, and a really sweet “Wanna help you Mama”. At that second, my heart swelled with pride and love. My little kitchen helper brought over his stool and he helped to mix the flour, and also the gooey peanut butter mixture.

Ciaran enjoys helping me in the kitchen.

You don’t really need a mixer for this recipe. We did it by hand, with our trusty whisk. Once the dough is formed, make sure you chuck it in the fridge so that it’s nice and firm for easy shaping later on. Now this is the part that Ciaran enjoyed the most. If your kid loves Play-Doh, this would be a fun activity!

Forming a cool pattern with the tines of a fork. Ciaran did a very good job!

Recipe

Ingredients:

  • 1 1/3 cups all purpose flour
  • 1/2 teaspoon baking powder
  • 1/2 teaspoon baking soda
  • 1/2 teaspoon salt
  • 1/2 cup (113g) unsalted butter, melted
  • 1/2 cup light brown sugar (I substituted with coconut sugar)
  • 1/2 cup granulated sugar
  • 1 cup creamy peanut butter (my preferred brand is Pic’s)
  • 1 large egg
  • 1 teaspoon vanilla extract

Method:

  1. Preheat oven to 175°C. Prepare your baking sheets (or just use a silicon heat-proof mat like I do).
  2. Sift the flour, baking powder, baking soda and salt together; set aside.
  3. In a large bowl of electric mixture combine the melted butter, sugars, peanut butter, egg and vanilla extract. Beat just until well blended. Add the flour and stir with a wooden spoon until combined.
  4. Refrigerate cookies until dough is stiff enough to shape into balls, about 2 hours. Using a tablespoon scoop out dough and with wet hands shape into 1 inch balls. Place 2 inches apart of baking sheet. Using the tines of a fork or a cookie press lightly press on the ball of dough to slightly flatten and make an indentation.
  5. Bake until bottoms are golden brown, 12 to 15 minutes. Let cookies cool briefly on the pans. Using a wide flexible spatula transfer the warm cookies to a rack to cool.

    Makes about 36 cookies.

    *Taken from Williams-Sonoma Cookie cookbook.
Done in just 15 minutes. These smell phenomenal and taste like roast peanuts.

They are pretty dope warm, and fresh out of the oven but make sure you let it rest for at least 15 mins on the pan so it sets right. I had to pry Ciaran away from the hot sheet pans as he was so eager to take some once he saw me get them out of the oven.

These would be really good if dipped in dark chocolate.

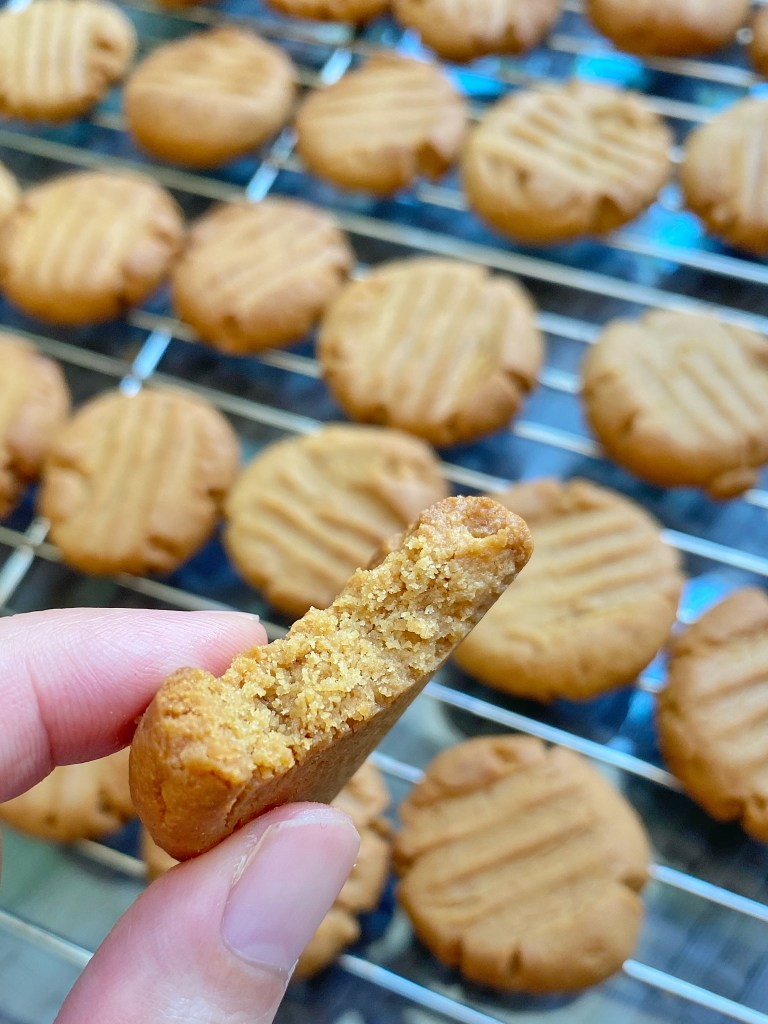
Ciaran wanted 1, 2, 3 pieces and since he was such good help, I obliged.

My sweet cookie monster.

Cookie-making is a great gateway to an exciting world of baking for kids who want to help in the kitchen. My 3yo boy seems to share our passion for food. We can’t wait for him to advance to ‘bigger’ recipes – even if it’s just so we can put our feet up one day and have him cook a meal for us.

To all mothers out there, I wish you a hearty Happy Mother’s Day. I congratulate you for all you have done and even more that you will do for your kid(s)!

Categories
Life

On Grief and Healing

The heart, though broken and very much hurt, may never be quite the same but the constant effort to mend and soothe results in a simple and vulnerable “wholeness”.

If (like me) you’re fast approaching ‘mid-life’ (that’s on an assumption that the life expectancy is +/- 80 years), you may have suffered some varying form of grief or loss; death, heartbreak, unemployment etc. Right now, the big rock we’re mourning is the loss of a ‘normal-life’, what with the on-going pandemic and our rapidly changing lives. With that much uncertainty clouding the known world, I find myself getting caught up with my grief.

I lost a loved one last year and my husband got laid off in March due to the pandemic and on most days, I struggle to keep sane in my little ‘home-office’ tucked in a corner of our gym room ‘talking’ to my laptop via the many conference calls required. I miss many things, though I have come to realise that I do not need much to survive or maintain equilibrium. This is what I have been relying on, to help me with my grief

  • Fortnightly 30-min tele-therapy sessions
  • Wisdom from brilliant minds such as Brené Brown, David Kessler, Don Miguel Ruiz (to name a few)
  • Open and honest (non-judgemental) communication with my dear husband
  • Soul-nourishing food, most of which are prepared my my chef-husband (god bless him)
  • Our joy – two sons, 3 yo and 7 mo.

Those 5 things above are what I now call my essential go-tos, to feel whole. And wholeness is a something we are searching now, more than ever.

“Grief is a time when we try to find our wholeness again”

– David Kessler

Grief may break us even when we try hard to be strong. Being broken is painful. There is a constant desire to distract with ‘happier’ thoughts and sweep these feelings under the carpet. The throes of grief causes deeper cracks as we propel ourselves into the depths of our feelings because that’s how we humans emote.

The beautiful, and ancient art of kintsugi – © tsugi.de

In many ways, I think of the grieving process to be very much like the Japanese art of Kintsugi (金継ぎ) or kintsukuroi (金繕い) – gold joinery (or precious metals) to fix broken earthenware. The heart, though broken and very much hurt, may never be quite the same but the constant effort to mend and soothe results in a simple and vulnerable “wholeness”.

No two kintsukuroi are the same, much like our individual experience. Every shattered fragment is unique, and when put together, forms an irregular pattern helmed by the pattern of each broken piece.

Broken. Put together. Wholly different. I am no philosopher, psychologist or therapist, but this analogy is relevant for me right now, as I seek to understand my mind, self and soul better. 

As for dealing with loss, I realised that there is no ‘moving on’, only ‘moving forward’. Grief becomes a part of you, like a piece in a jigsaw puzzle. Grief ‘guru’ David Kessler argues that “it’s finding meaning beyond the stages of grief most of us are familiar with—denial, anger, bargaining, depression, and acceptance—that can transform grief into a more peaceful and hopeful experience”. I could not agree more.

If you relate to what I’ve shared here, about grief and loss, I invite you to take a quiet hour for yourself to think about how you would prepare your own kintsukuroi and maybe take a listen to this brilliant podcast featuring David Kessler.

David Kessler expounds about the Sixth stage of meaning with Brené Brown.

Sending you plenty of light and love, whoever and where ever you are.

Categories
recipe

Easy Breezy Oat Squares

My g0-to fast snack option for the family. Takes less than 15 mins.

Snack bars are my achilles heel. Last month, I counted more than 6 varying types and brands of snack bars bursting through my pantry shelves. Granola, nut, protein, chia seed, wholegrain, and buckwheat bars, just to name a few. My husband Daryl has since banned me from adding to my impressive stash. I am trying to reign my obsession in. I would argue that snack bars are an essential. Fellow mothers reading this, I’m sure you’d nod in unison to all the reasons why snack bars are a must-have (especially with our on-going Covid-19 pandemic)!

  • You can multi-task even if inundated with back-to-back-to-back work conference calls; no time for lunch, no problem, a bar, 3 bites and all the energy to keep going
  • Keeps for longer, which means lesser grocery runs
  • Nutritious! Well most are, depends which ones you get. I like oat-based, wholegrain ones.
  • Great for when I feel peckish and trying not to open that bag of crisps.

But I’m not here to sell you snack bars or fawn all over them. I wanted to share a really great snack bar recipe I found and have been adapting every time I make it. Since I gobble that much snack bars, I might as well make my own and put in all the good stuff.

Pre-sliced oat bar in pan
No-bake oat snack bars, prior to slicing.

These bars are a cinch to make because they do not require you to bake and only involves 5 ingredients (excluding the fixings you decide to add).

Recipe

Ingredients

  • 1 heaping cup packed pitted dates (medjool/deglet noor)*
  • 2 tbsp maple syrup (or agave nectar or honey) 
  • 2 tbsp barley malt syrup*
  • 1/4 cup creamy salted natural peanut butter (or any nut butter really)
  • 1 cup roasted unsalted almonds, coarse chopped
  • 1 1/2 cups rolled oats, toasted (I like to use Bob Red Mill’s Extra Thick Rolled Oats)
  • Cocoa nibs, raisins, cranberries, vanilla, or any other dried fruit etc would make great add-ins.

Method

  1. Process pitted dates in a food processor or blender (I use the latter and it works fine) for about 1-2 mins until it forms a sticky dough-like consistency.
  2.  If your almonds aren’t pre-roasted, toast them at 150°C for 10 mins
  3. Optional: Toast your rolled oats at 180°C for 10-12 mins (it should be a nice toasty golden brown)
  4. Combine rolled oats, almonds and date mixture in a bowl and set aside
  5.  Combine your syrups and peanut butter and warm them up in a small saucepan over low heat. Stir and pour over the oat mixture. 
  6. Use a sturdy spatula to mix thoroughly, until combined. Place in an 8×8-inch baking dish or a small pan lined with plastic wrap or parchment paper so they lift out easily.
  7. Press down firmly until uniformly flattened.  Cover with parchment or plastic wrap, and let firm up in the freezer for 15-20 minutes.
  8. Remove bars from pan and chop into however many bars or squares you want, to size. I prefer small bite-size 1.5 inch squares.
  9. Store them in the freezer so they last longer.

Notes:
*Barley malt syrup is something I just discovered. It is easily available on iHerb and is an unrefined liquid sweetener made from soaked and sprouted barley. Its consistency is similar to molasses and golden syrup. I find that it helps bind these snacks better and I really like the flavour.
 

Tasty morsels filled with oat-goodness.

As a chocolate fiend, I had to resist throwing in chocolate chips into these bars. I wanted it to be healthy so cocoa nibs was a good alternative. It was a double-win actually – bittersweet meets natural gooey sweetness. Utter bliss and without (that much) guilt. I much prefer these bars now, and have indeed been buying less commercial made ones.

My son Ciaran is a huge fan of these snack bars.

Simple and (slightly) effortless, that’s everything you need to know about these bars. Blend, chop, mix, freeze and slice. I usually make them at night so they are nice and sturdy by the next day for my (and my son’s) enjoyment and due sustenance.